

The Difference between “Visual” and “Mixing” Complements©
BY HILARY PAGE
This information will change the way you paint!
Most artists know that complementary color pairs can be used for two functions. These are (1) for color mixing- to make clear colors more neutral and (2) for visual color enhancement- to make juxtaposed colors appear more colorful. Most artists, however, are misinformed about the actual colors of complementary colors pairs. So read on! This information could change the way you paint!
Long before I began to research color I realized that specific pairs of colors mutually enhance one another. This was because in my youth in England when I used to paint color coordinated plaster pixies to sell for extra pocket money, I found that certain combinations such as blue and yellow, were particularly pleasing. These same color pairs are what I now call “visual complements” though I didn’t call them by that name in those far off days!
My later experience as a painter, and research for my books “Color Right from the Start” and “Hilary Page’s Guide to Watercolor Paints” led me to question the prevailing literature on the subject of complements for artists. It gradually became clear to me that there are not just one set of complementary color pairs but two sets and of colors and they are not the same, though most artists are unaware of this.
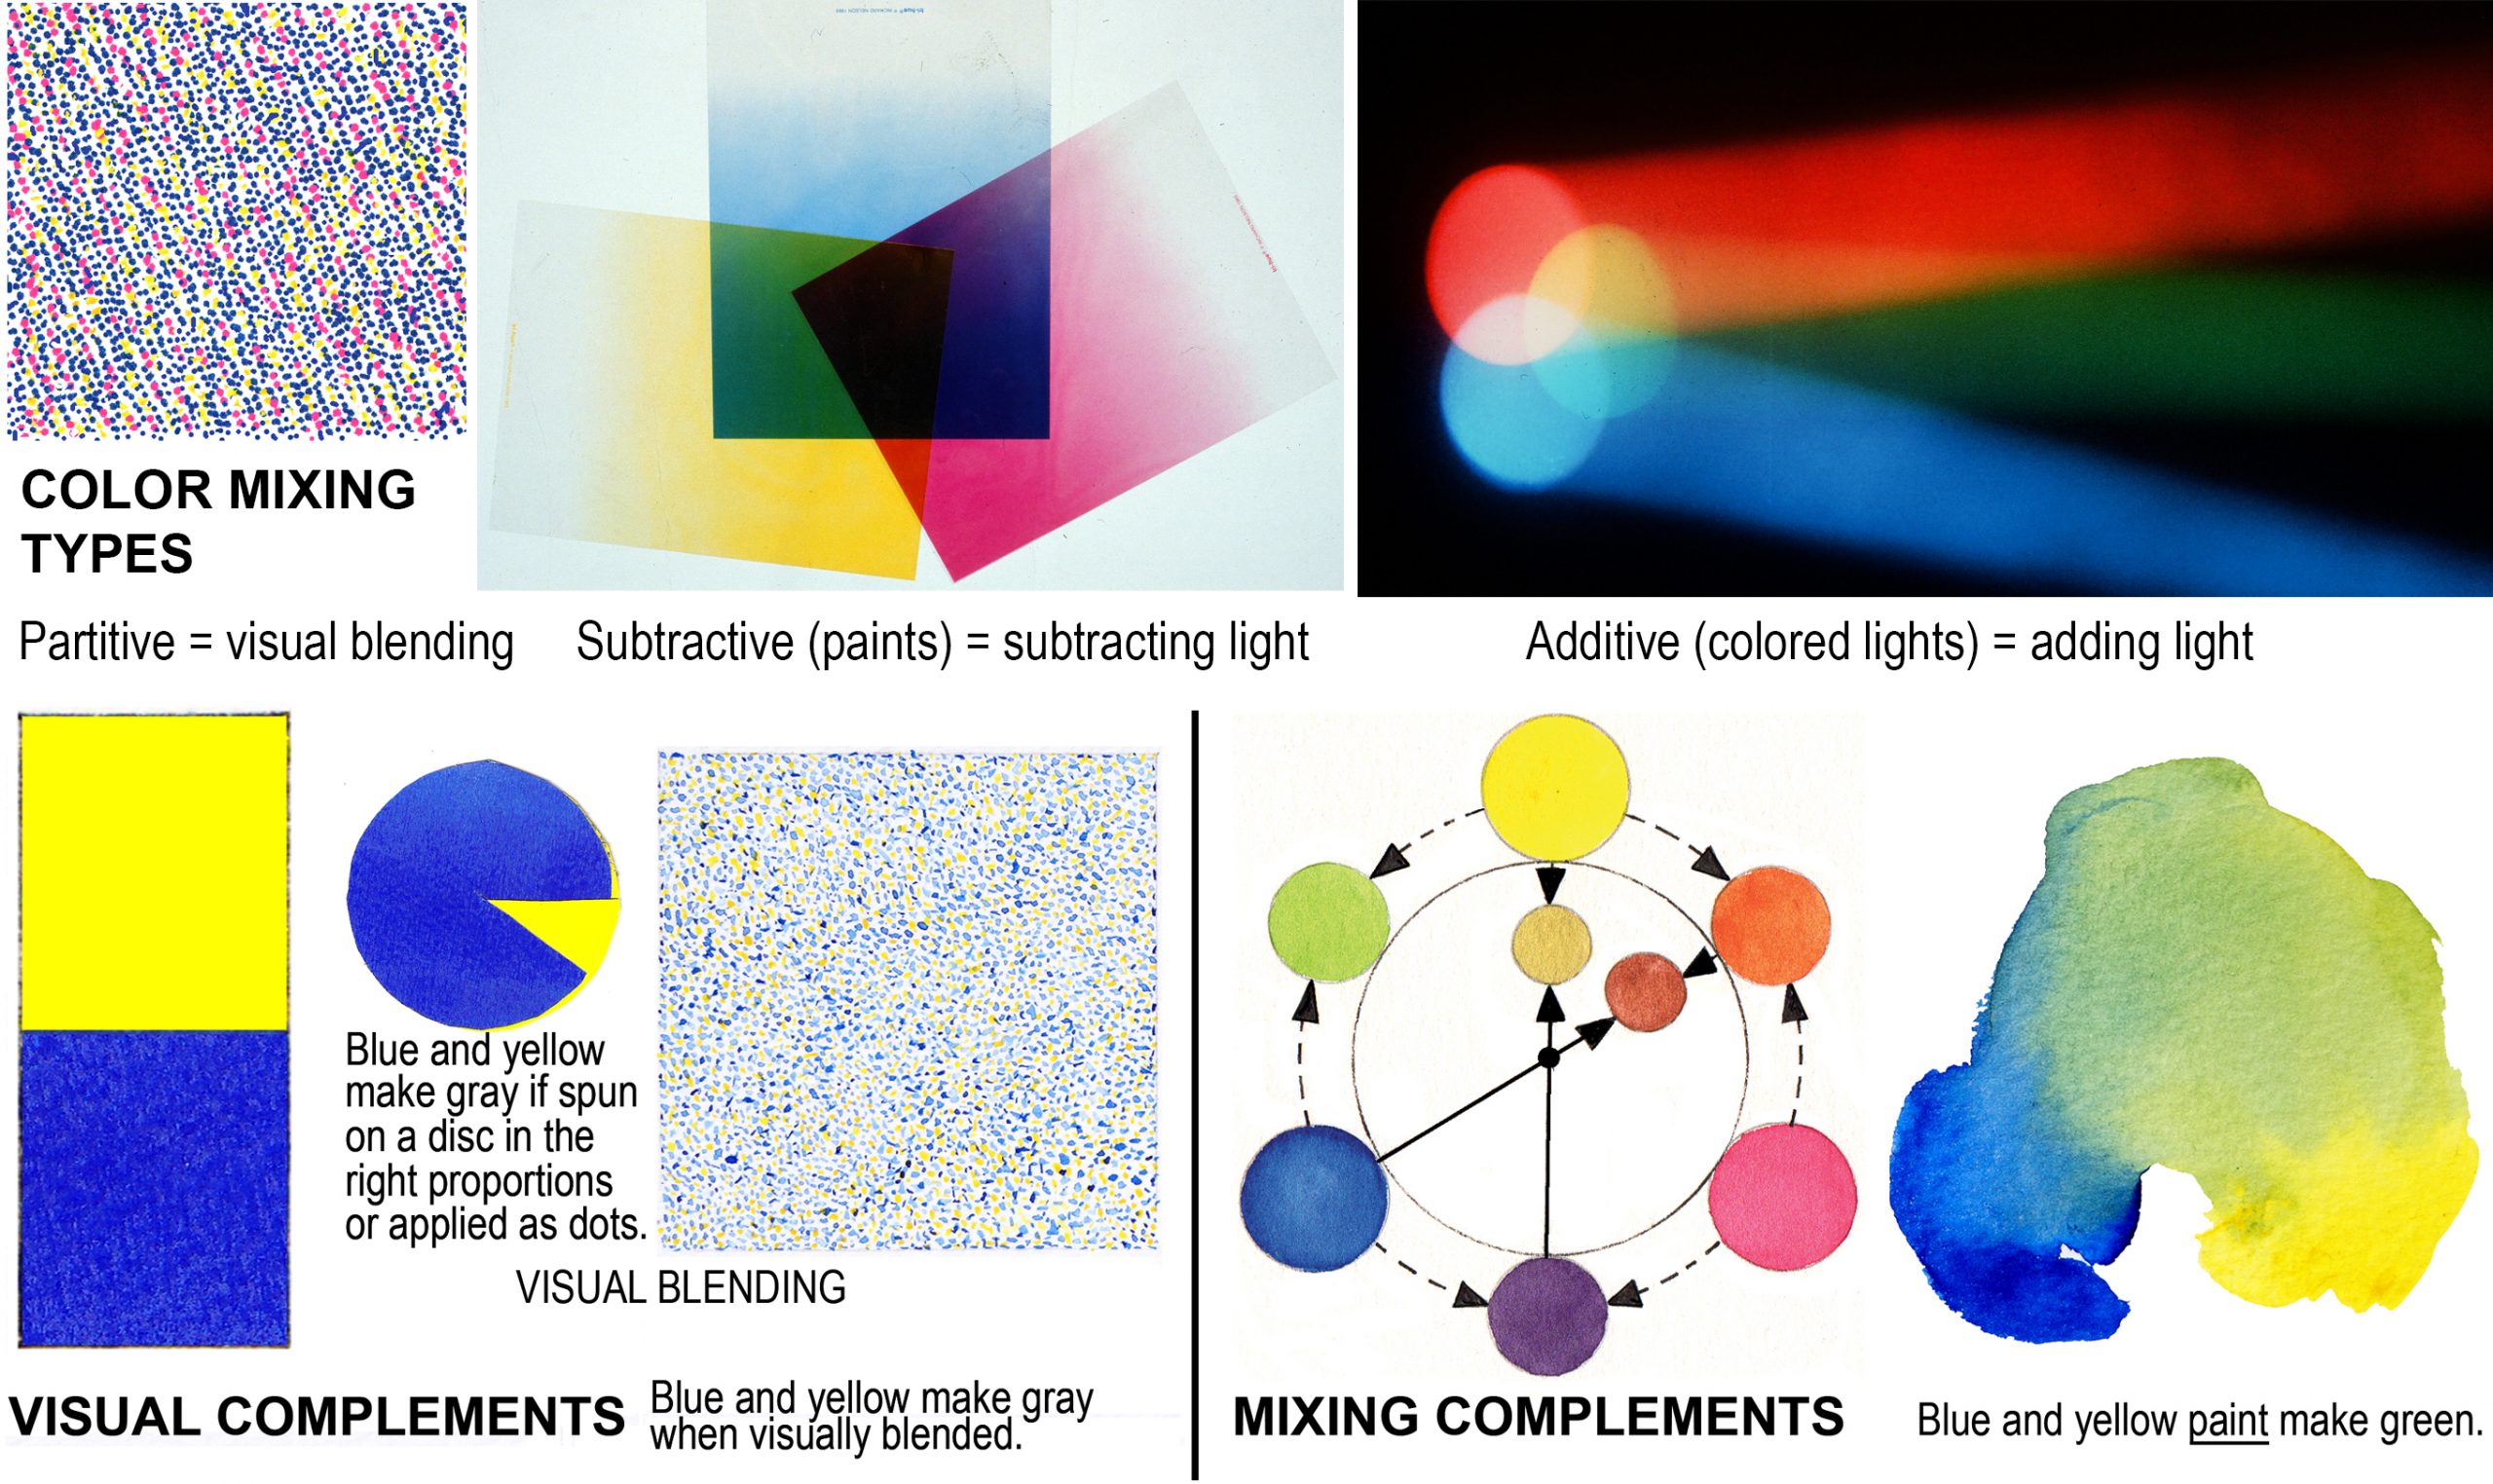
My research took me to the basics. What is a complement? A complement is “that which completes.” So what do MIXING and VISUAL complements complete that makes the color pairs to be different? This is the crux of the matter: “MIXING” complements complete the subtractive color mixing process associated with painting. “VISUAL” complements complete the visual synthesis which is to to with seeing and visually blending. So I coined the names “MIXING” and “VISUAL” complements to describe the difference between the two functions of the two types of complementary color pairs.
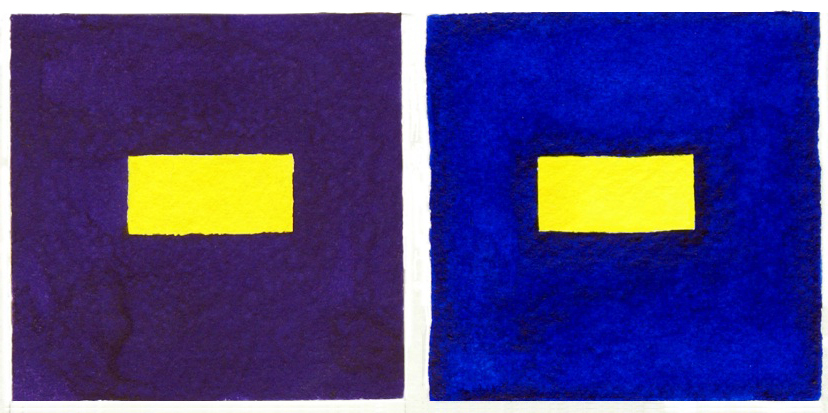
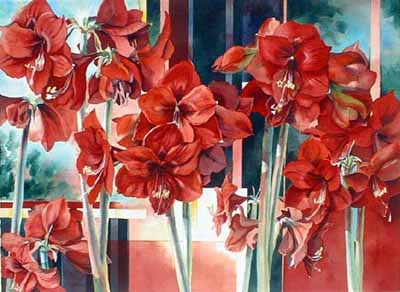
Lemon yellow appears more brilliant when surrounded by its visual complement which is blue. Many artists erroneously pair yellow with purple and vice versa for color enhancement. This is wrong.
Subtractive synthesis: The term refers to how the transmitted light that reflects from your paper is subtracted i.e. gets darker each time you add another paint to the mixture as in the illustration below. Squint at it to see what I mean. In practice, subtractive color mixing for artists using paint on paper has come to refer to paint mixing.
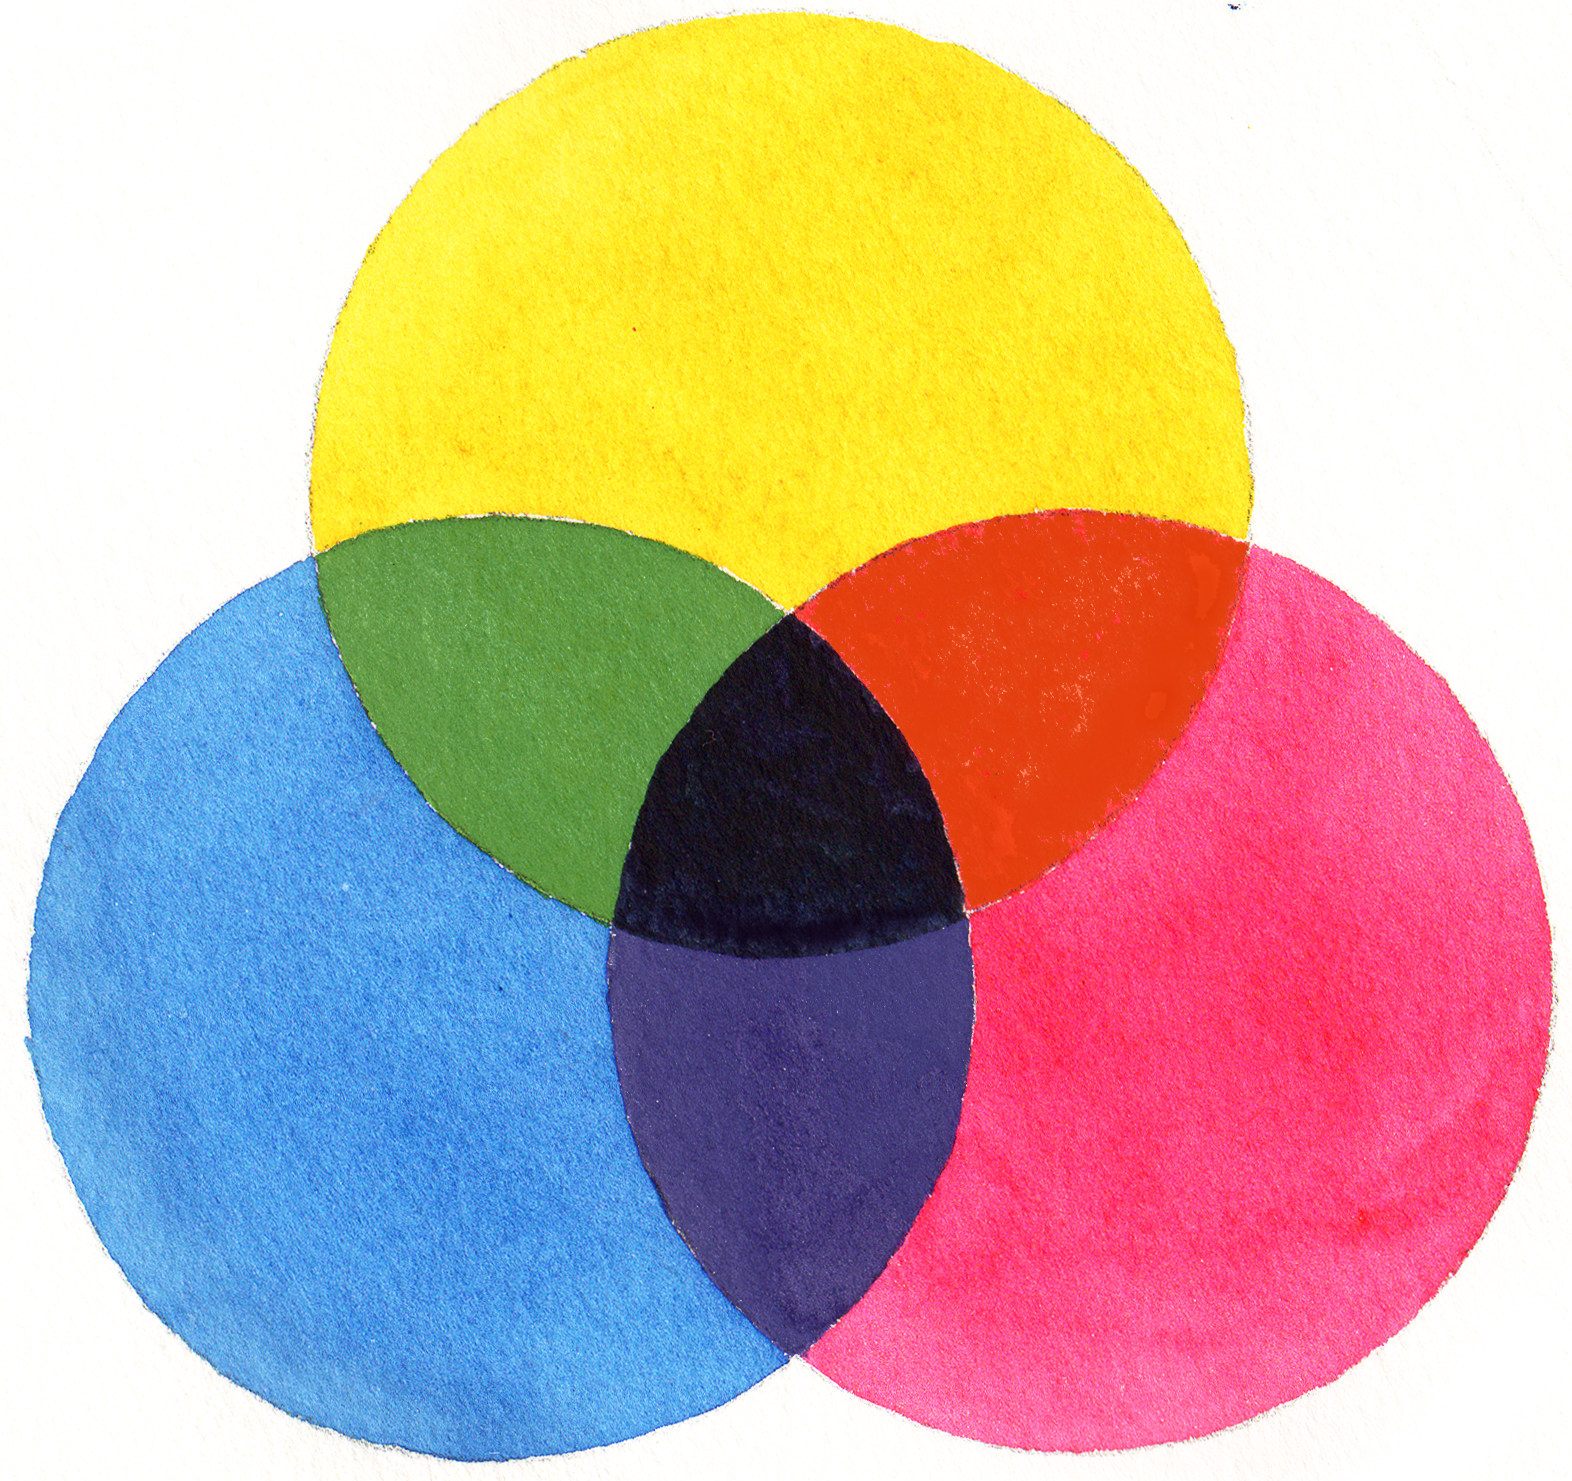
The completion of the subtractive process is black. The color pairs of MIXING COMPLEMENTS are determined because they make black or a very dark gray. In other words they complete the subtractive mixing process. The MIXING COMPLEMENTARY color pairs are a yellow/purple, red/green and blue/orange. We place MIXING COMPLEMENTS opposite one another on the color wheel as below.
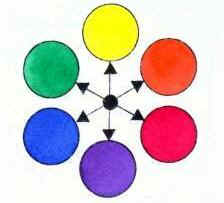
MIXING COMPLEMENTS
When neutralizing a color it is not necessary to have the precise “mixing” complement. A touch of any purple for instance will render most yellows quite unsaturated. Here are the paint colors I have used.
(Permanent) Rose (PV19 red shade)
Winsor Lemon (PY175)
Winsor Blue red shade (PB15)
Green: Winsor Lemon PY175 & Winsor (Phthalo Blue RS PB15:1)
Orange:mixed from Permanent Rose PV19rs and Winsor Lemon PY175
Purple: Carbozole (Winsor) Violet PV23, OR mixed from Winsor (phthalo) Blue RS & Permanent Rose PV19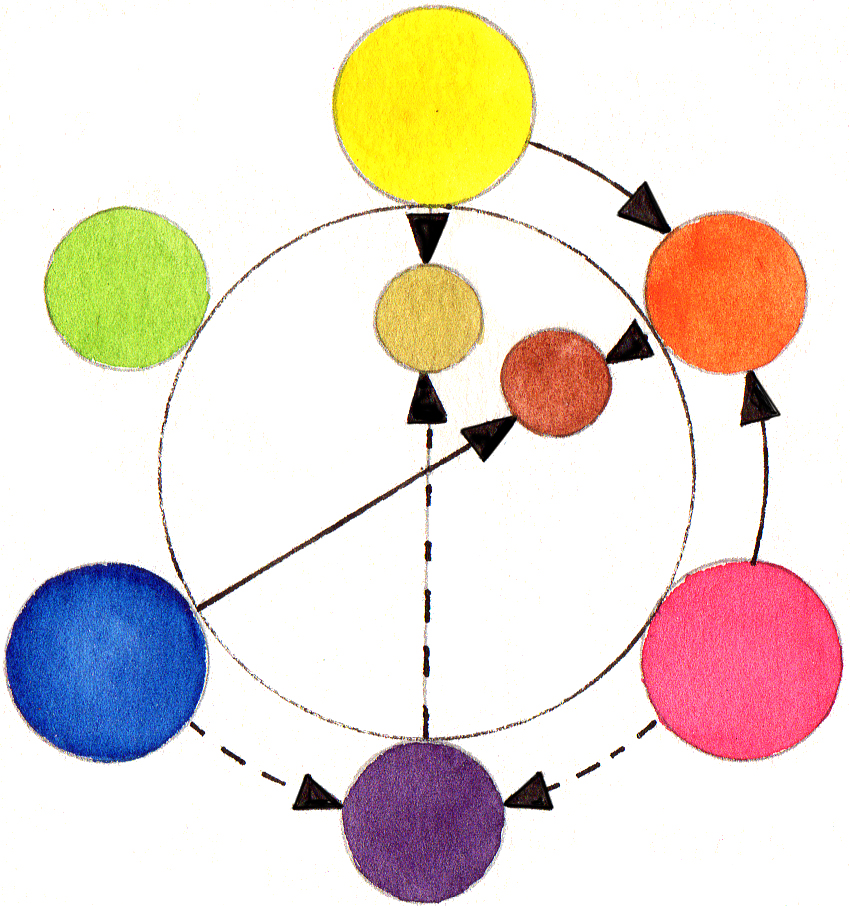
We use MIXING COMPLEMENTS that we place opposite one another on the color wheel to make bright, saturated colors more neutral or duller.
←For instance, add a touch of purple to yellow and you will get a dull “mustard” yellow.
←Add a touch of blue to orange and you will get a dull orange, which is brown!
Visual synthesis: The term refers to how the eye visually blends colors. The actual complementary color pairs are determined because they complete the visual synthesis and appear as a colorless gray when mixed together in the right proportions such as when painted as dots or spun on a disc. You don’t paint dots of color to use visual complements. Dots are used to determine the correct color pairs.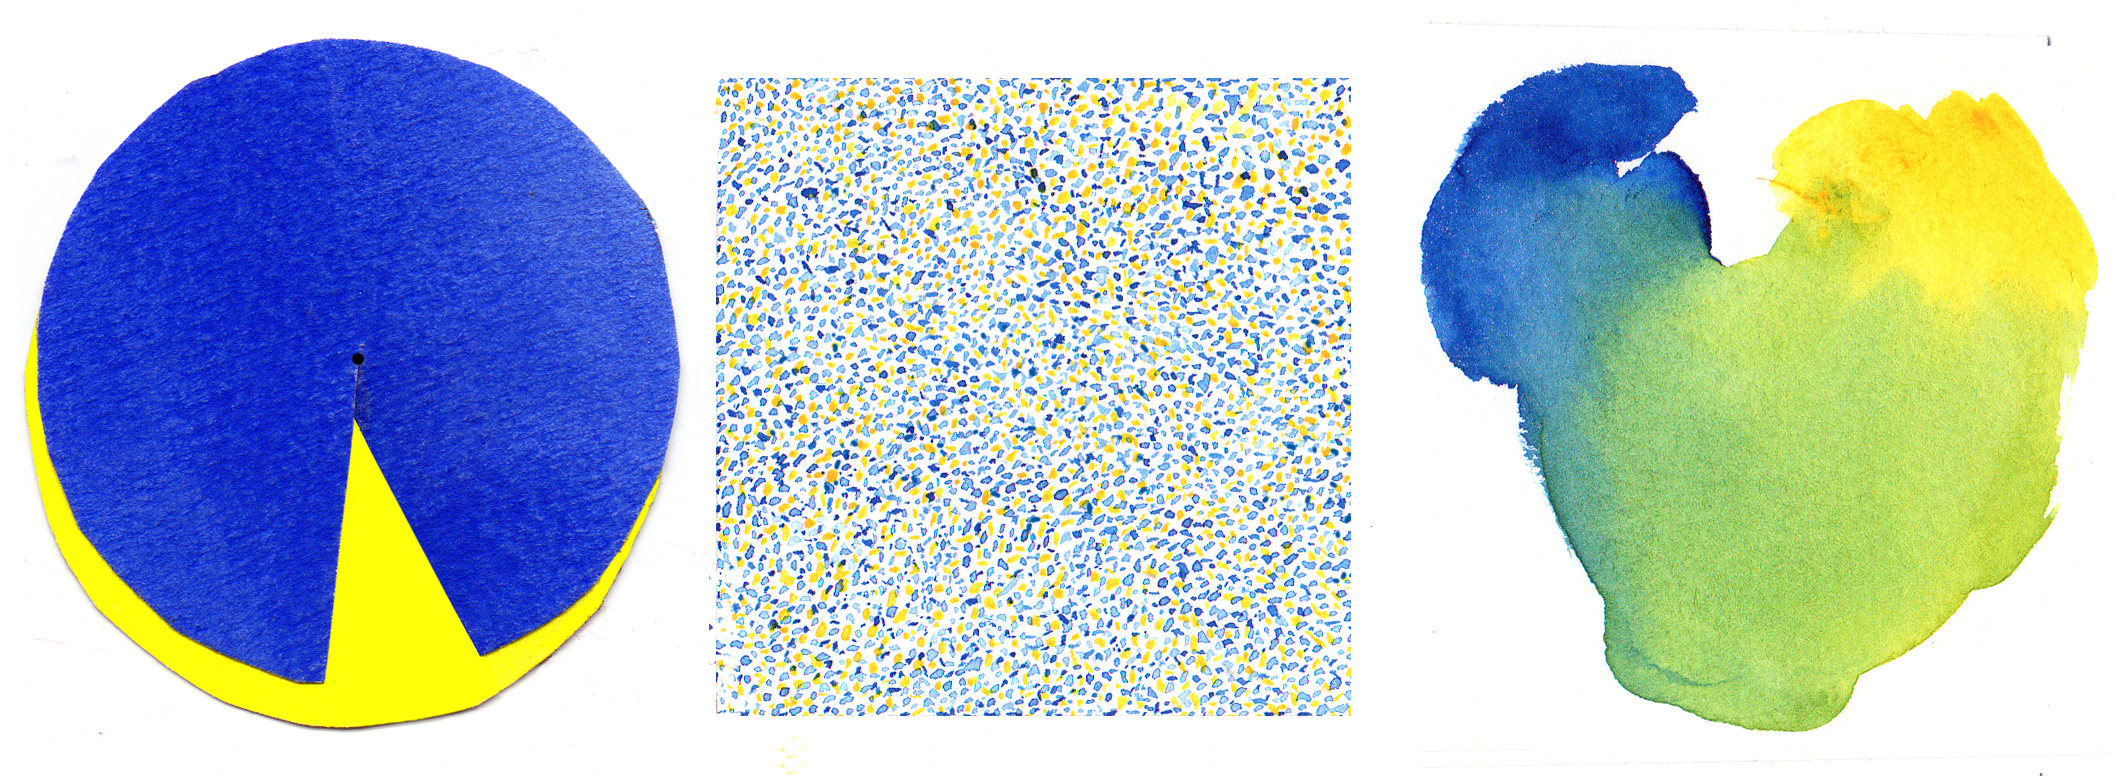
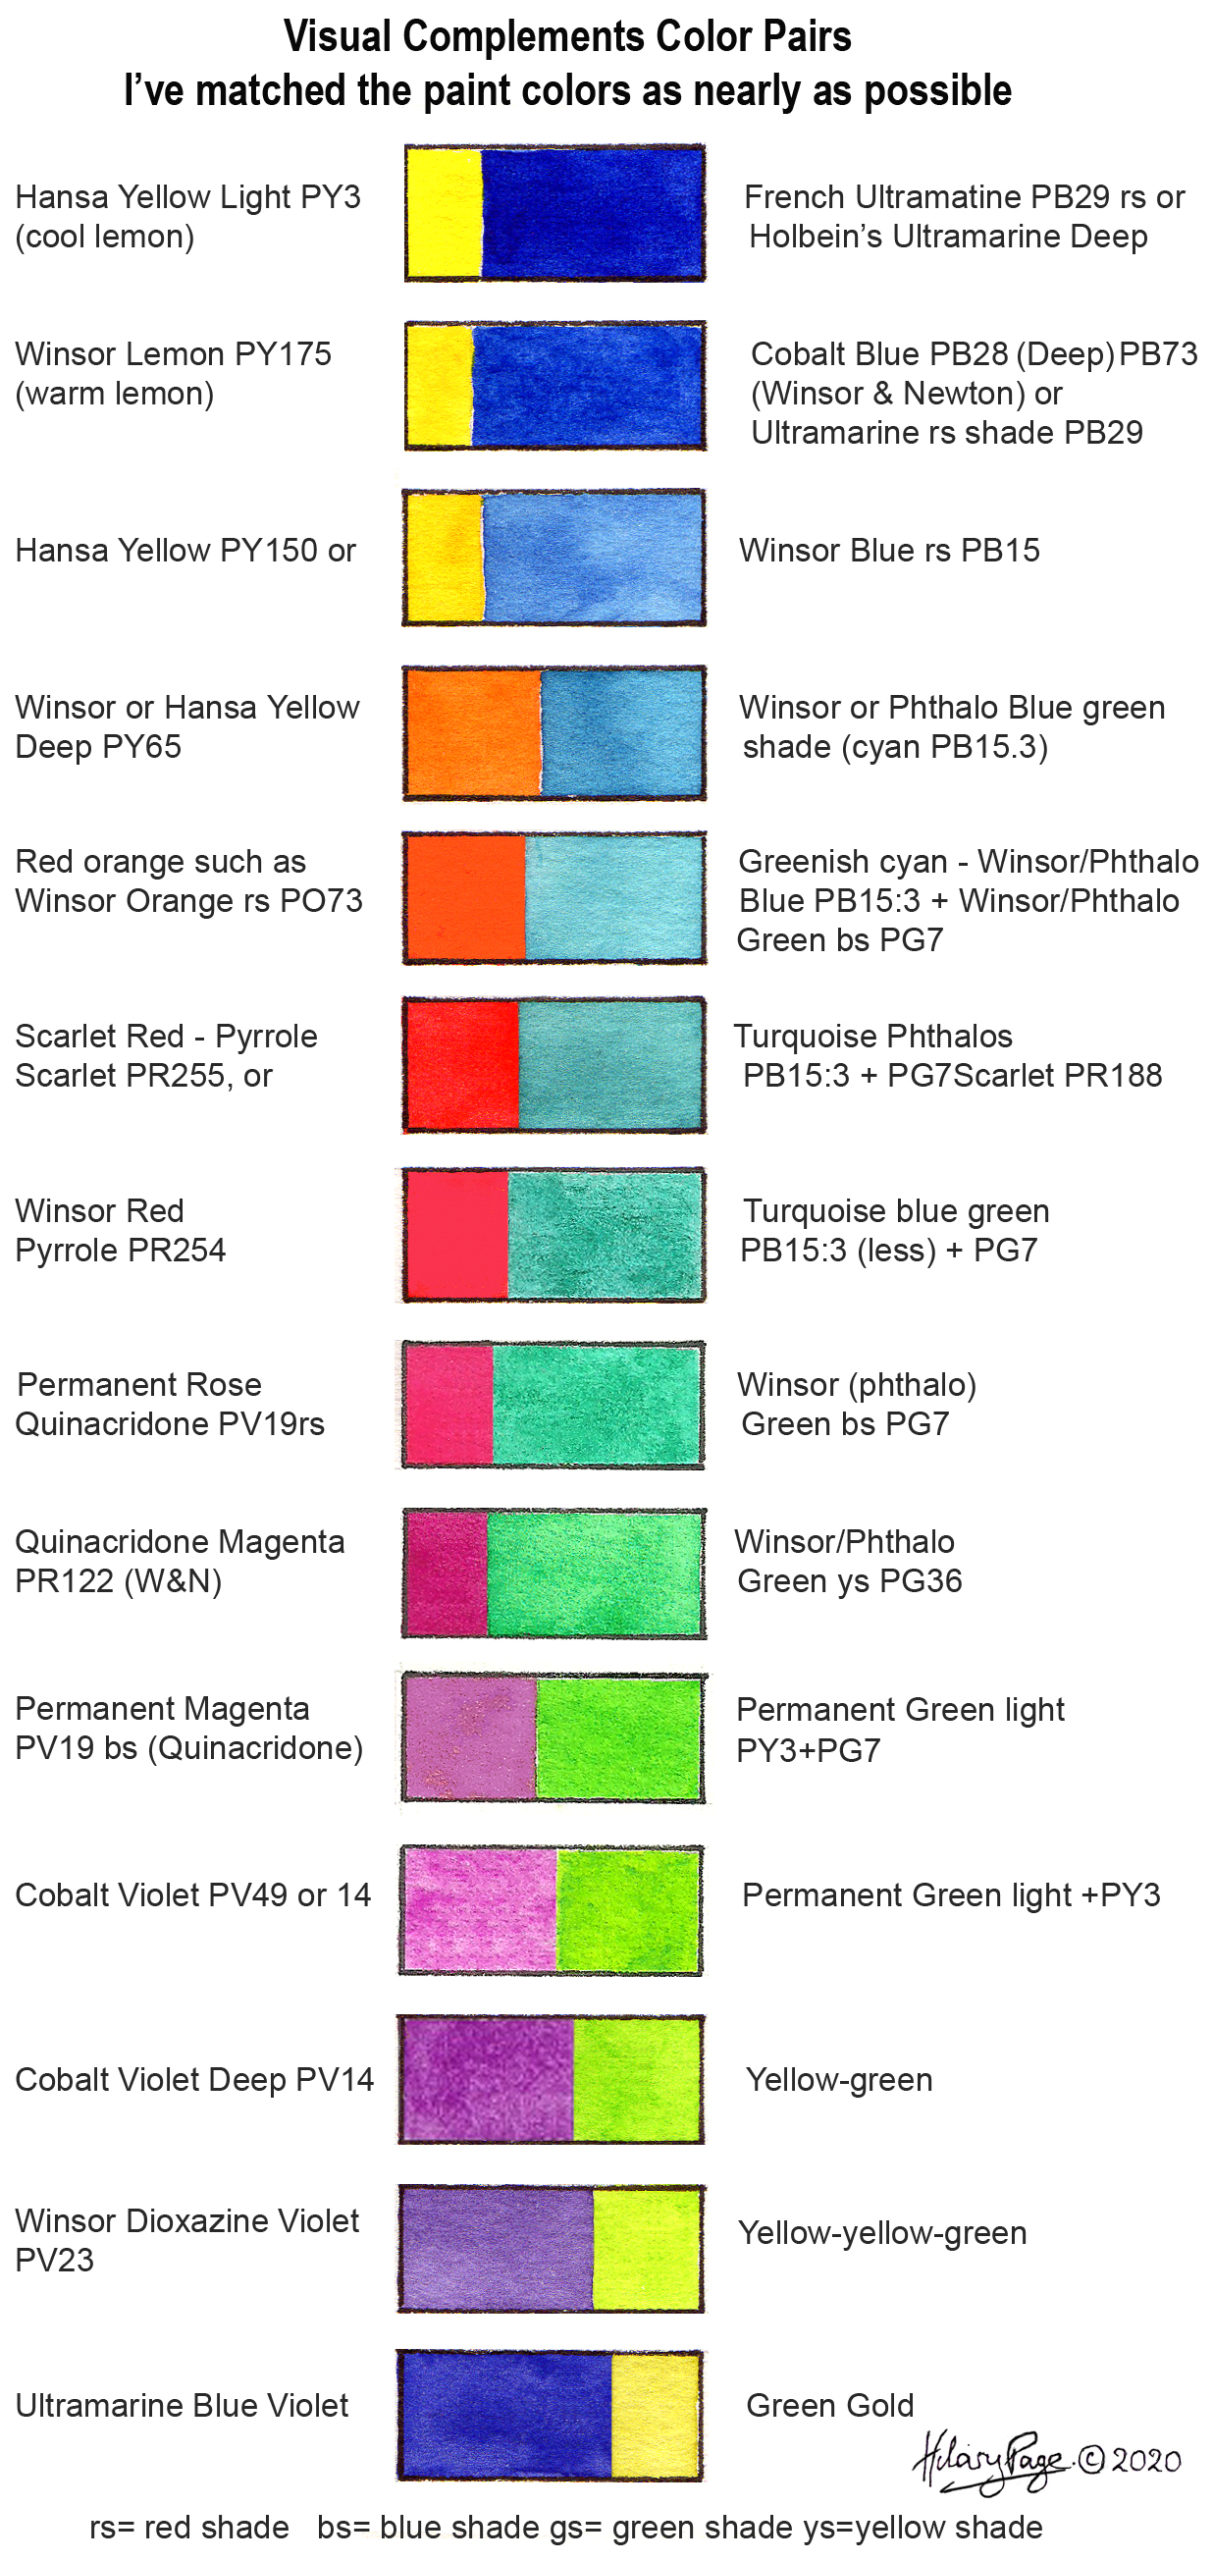
The correct “VISUAL COMPLEMENTS” – color pairs as shown below- are used for color enhancement. The pairs when seen together make each one appear more vibrant when they are painted contiguously. i.e. blue will appear more vibrant if juxtaposed with yellow.
The visual color pairs were quantifiably established by Ellen Marx in her incisive book “Optical Contrast & Simultaneity” (1983 Van Nostrand Reinhold Company Inc). I determined the corresponding artists’ pigments as on the vertical chart below.
Note that the colors of “visual” complements nearly correspond to the colored “light” complements that complete the additive synthesis of adding colored lights. The right additive pairs of lights when shone together yield a dullish WHITISH light. BUT WE DON’T PAINT ON PAPER WITH LIGHTS!
COMPLEMENTARY CONFUSION The mistake in not distinguishing the difference between the colors of MIXING and VISUAL complementary color pairs dates from the start of the nineteenth century.
Th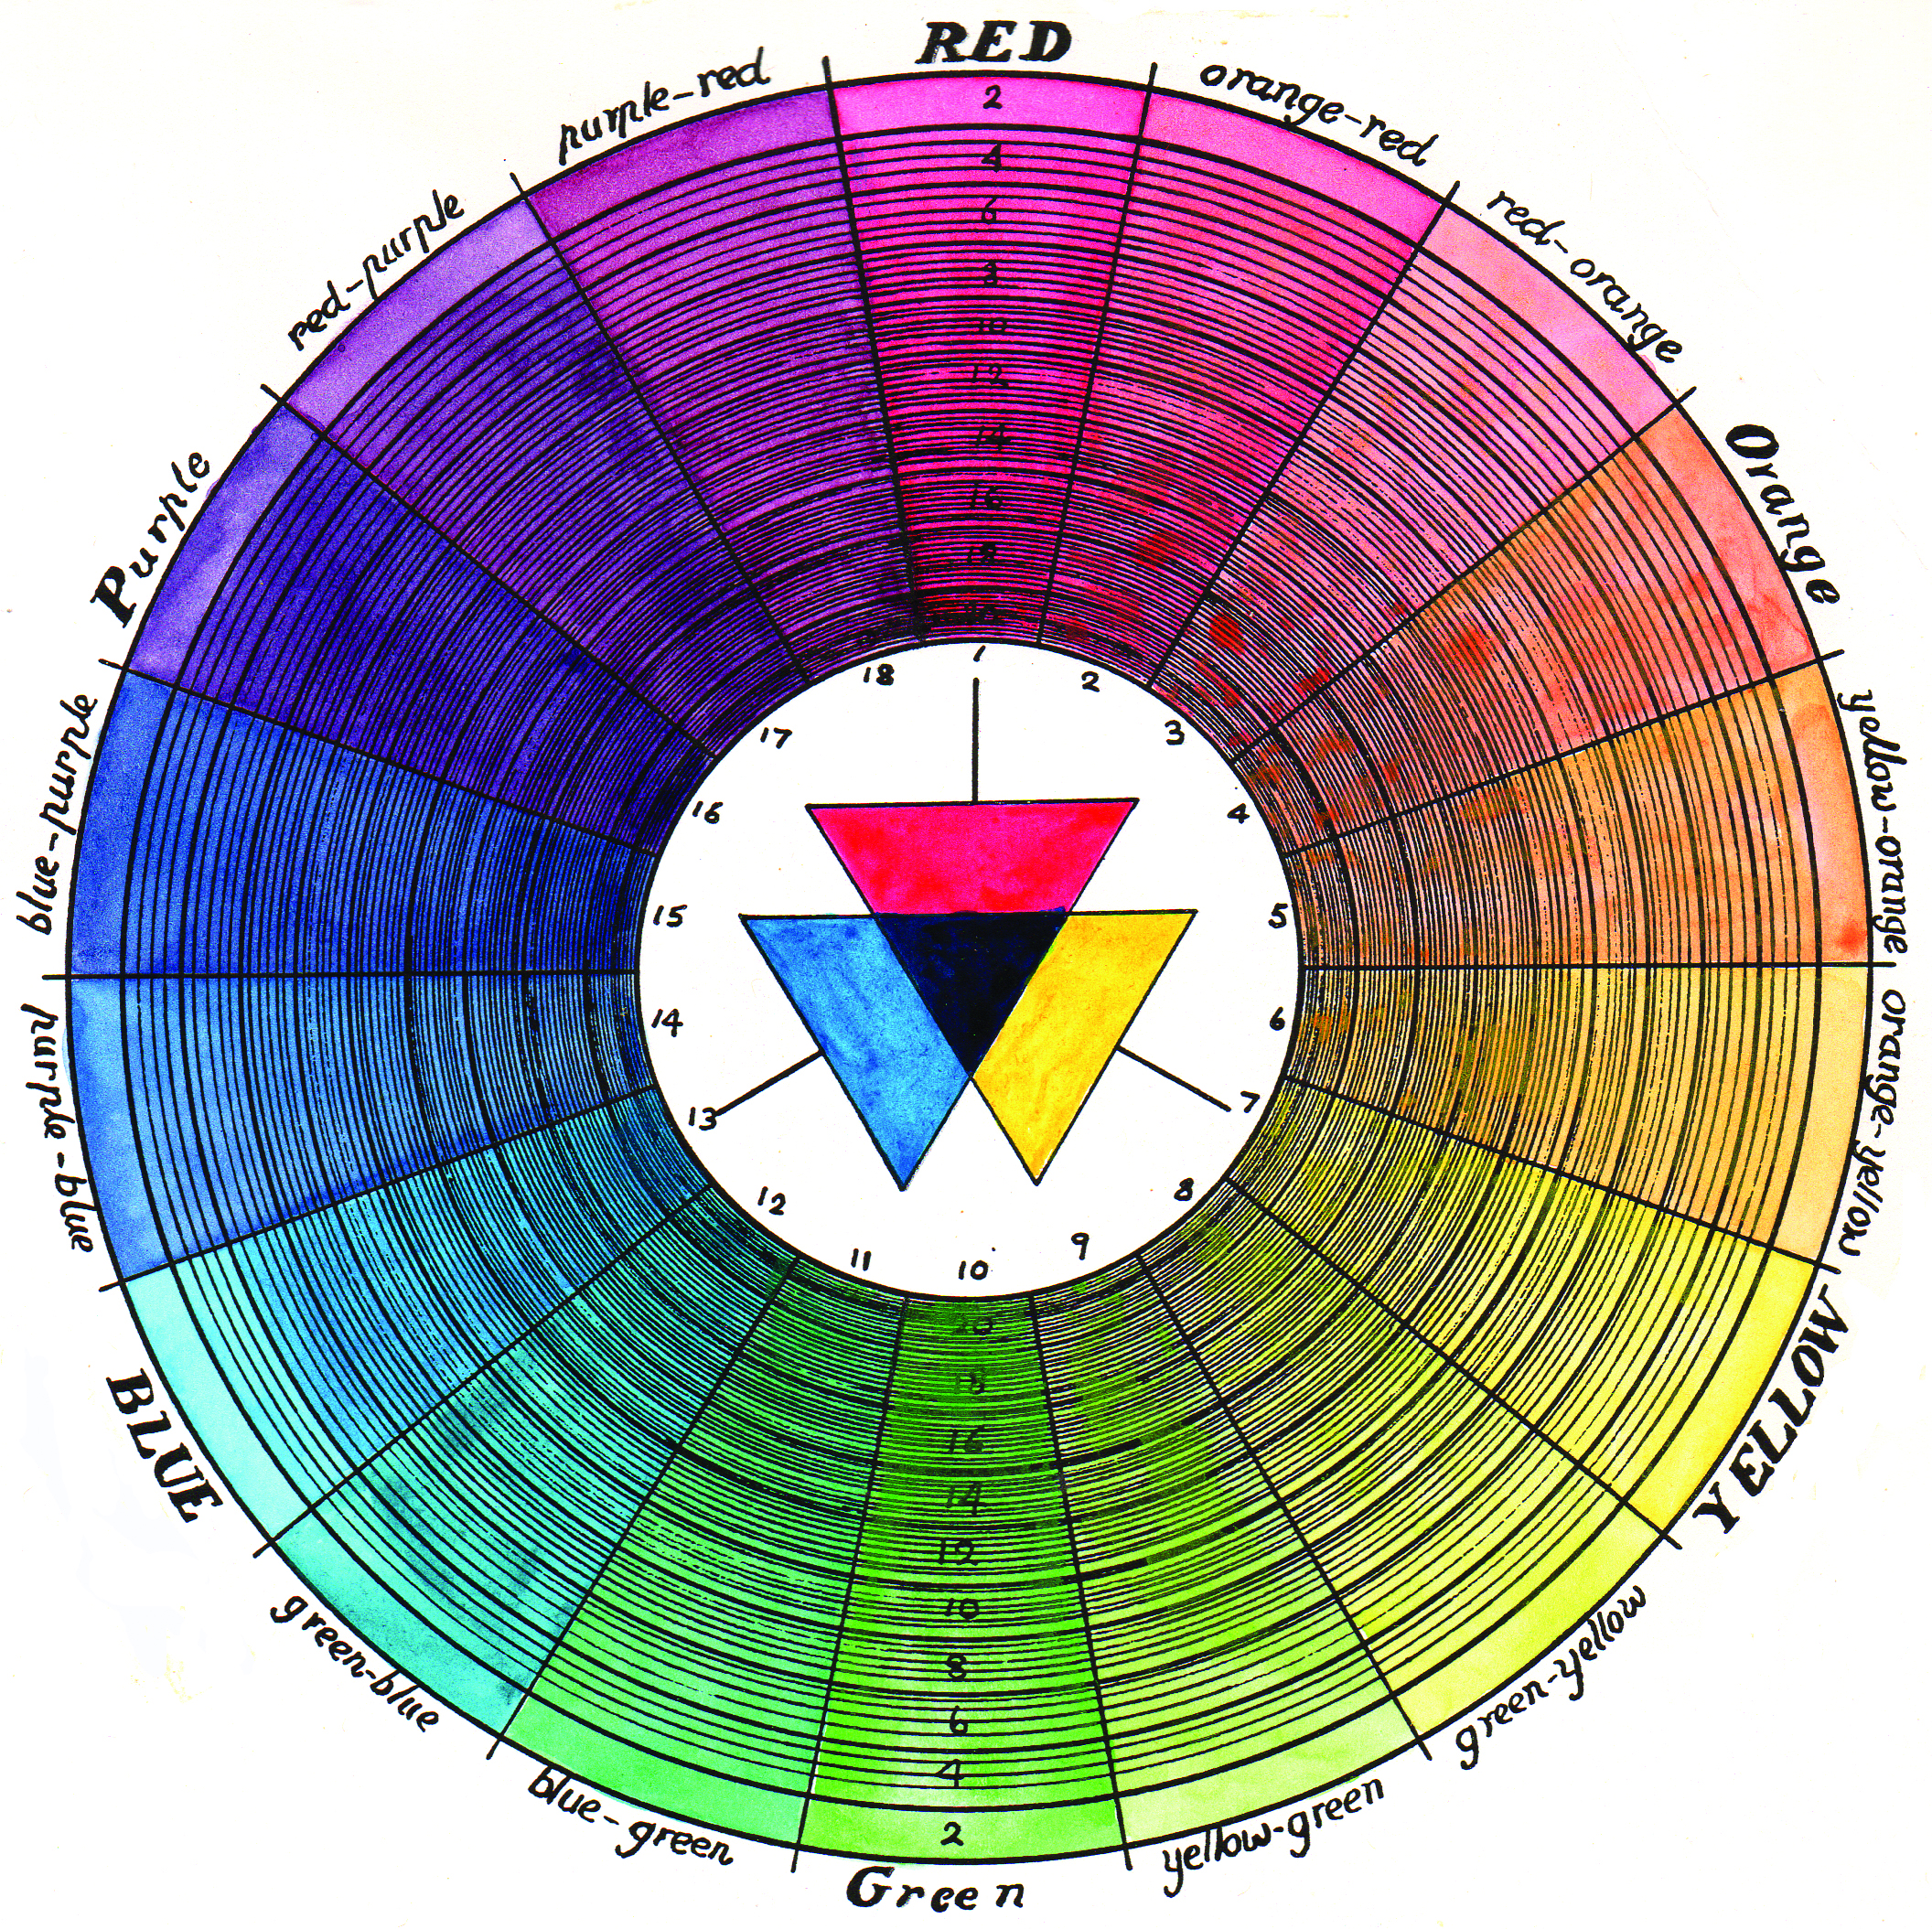 e first color wheel was created by Moses Harris in 1776. It was specifically designed for painters as an “aid to color mixing”. Harris painted the three primary colors red/yellow/blue/. Then he mixed three “secondary” colors- green/violet/orange/- from the primary colors. He lace the six colors equidistant from one another on his wheel so yellow is opposite to purple.
Johann Wolfgang von Goethe, the prolific German author, stated in his “Theory of Colours” (1810) that for “completeness” the eye produces a “complemental hue upon each color”. This is whence the term “complement” comes. It does not have the same meaning as understood by a “complement” in today’s art but refers to the after image effect named later as successive contrast. Goethe’s observations were visual. Yet he uses the same color pairs as those of Moses Harris.
The confusion was sustained by Michel-Eugene Chevreul, a French chemist and color theorist. In his book “The Principles of Harmony and Contrast of Colors and their Application to the Arts”(1839) he offered a wheel showing complementary pairs and specifically stated that this was for color modification “upon the eye”, and not for paint mixing. However, since he used the same colors pairs as Goethe, he continued the error of not distinguishing between “mixing” and “visual” phenomena. For instance, he used yellow/violet instead of yellow/blue for color enhancement. His color combinations were then erroneously used by many of the French Impressionist painters as well as fashion, garden and interior designers of that period.
Many artists then wrongly took the colors of Moses Harris’ wheel and used them for color enhancement (simultaneous contrast) as well as for color mixing.
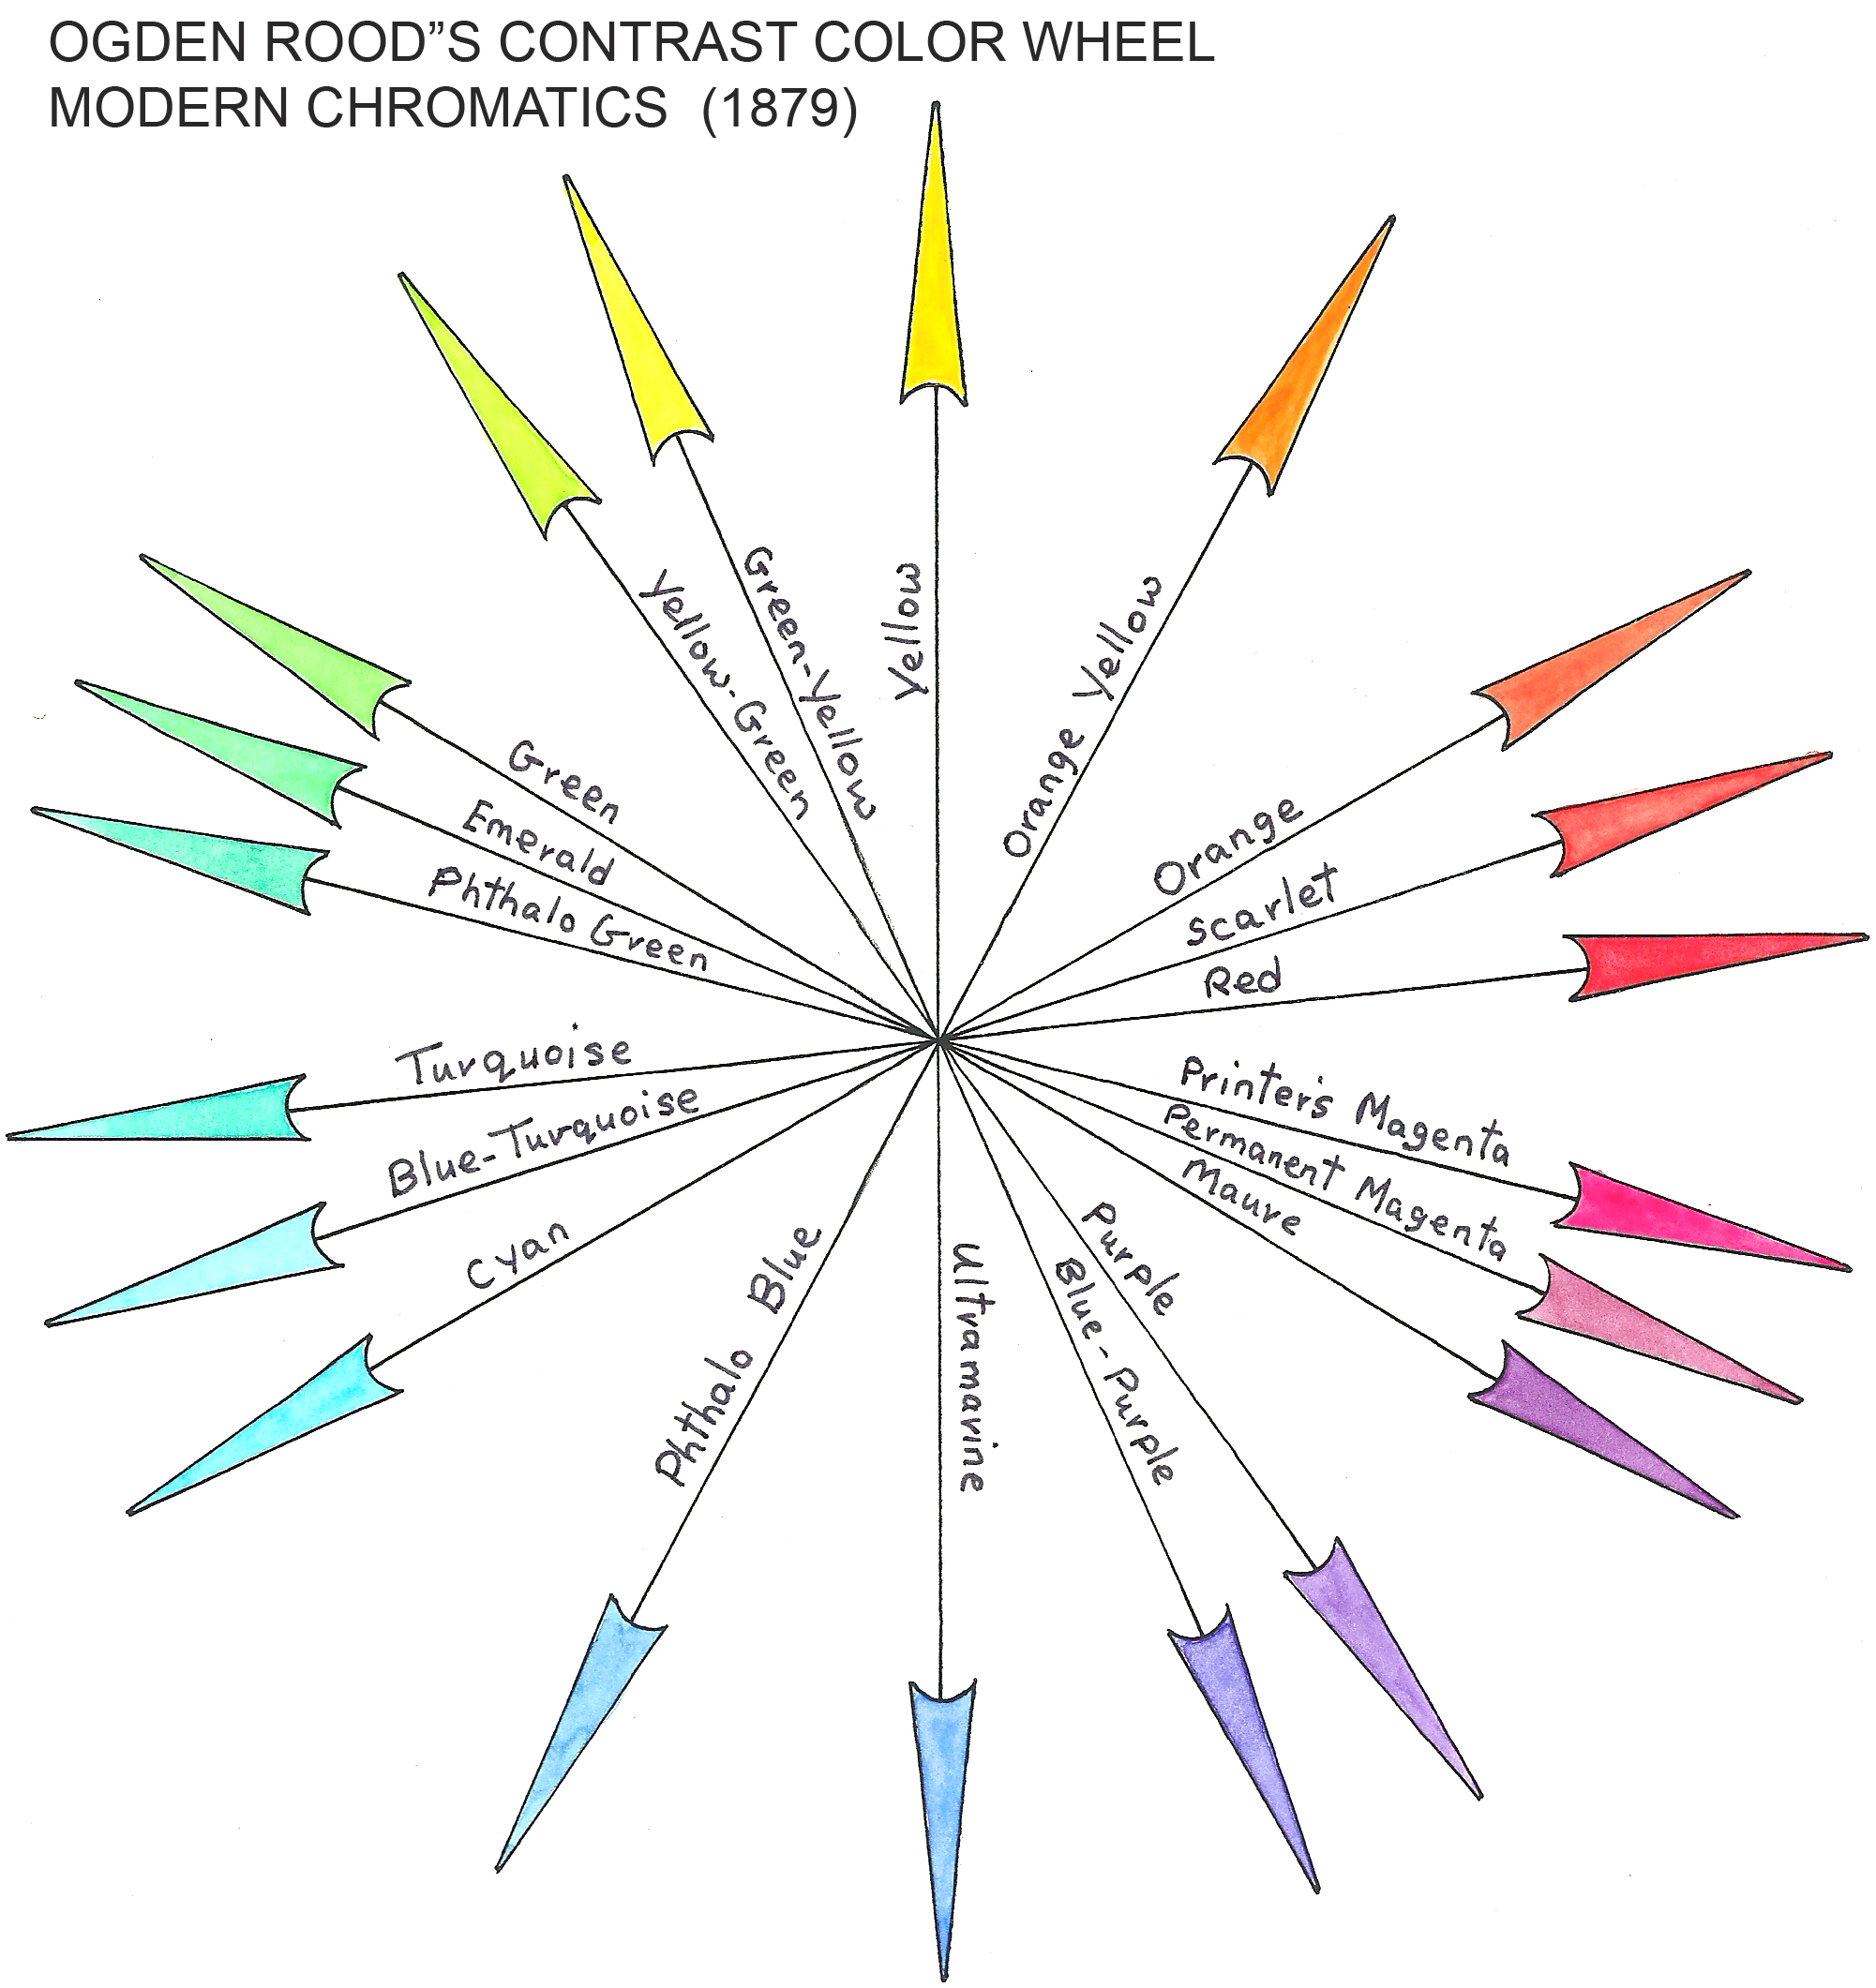
Ogden Rood in “Modern Chromatics” (1879) named the correct “visual” complementary contrast colors pairs that he described as “companions” that when juxtaposed glowed “with more than their natural brilliancy”. Unfortunately, he failed to articulate that there was a difference between “visual” and “mixing” complements.
And so the confusion continued- until today when I hope this article has sorted out the mess regarding the difference between MIXING and VISUAL COMPLEMENTS. Let me know! by email. You might also be interested in my DVD/video on Visual Complements and Watercolor Right from the Start. Both are available from this site. See the orderform.
Hilary Page 10.5.21
This material was originally published by Daniel Smith Inc. in 2000 in their Inksmith publication. Sally Drew Editor. Also in The Artist UK magazine, Dr Sally Bulgin, Editor.
This article/site was upgraded 2019 Copyright 2019©. Material may not be republished in any medium without written permission from Hilary Page.
I hope you enjoy working through the demonstration below on using “visual” complements.
LEMONS ON BLUE DEMONSTRATION:
A STUDY UTILIZING VISUAL COMPLEMENTS
BY HILARY PAGE
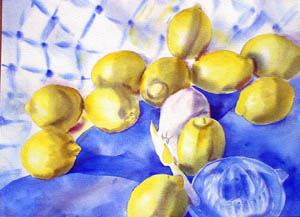
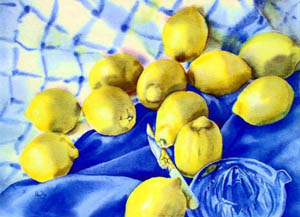
Here is a demonstration from start to finish in which I have used a visual complementary pair of colors- yellow and blue for color enhancement: I juxtaposed the yellow lemons with their visual complement, blue, to make the lemons appear especially brilliant.
This Lemons on Blue study is easy for you to duplicate at home or in your studio. All you need are a dozen or so fresh lemons, a couple of blue cloths, possibly a lemon squeezer and a knife, and hey presto! You can paint along!
I used a quarter sheet (11X15″) Arches 140Ib cold pressed paper and the following Daniel Smith paints:
-
-
- Hansa Yellow Light (PY3)
- Hansa Yellow (PY97)
- Cobalt Blue (PB28)
- Ultramarine Blue GS (PB29)
- French Ultramarine RS (PB29)
- Quinacridone Rose PV19r
-
After carefully arranging my lemons and cloths by a north facing window I made a credit-card sized value sketch by squinting to help me see the value. I then did a line drawing to scale on sketch paper which I subsequently transferred to my watercolor paper using a light table. I don’t like to photograph and trace off a drawing since this does not allow for creativity and improvisation, and anyway it’s too boring!
I next squeezed out blobs of paints in three separate palettes for my blues, yellows, and grays. I mixed the grays from Cobalt Blue, Quinacridone Rose and Hansa yellow light. I put about a teaspoonful of water in each palette. To complete by preparations, near where I was working, I placed an absorbent cotton towel on a board that was a little larger than my watercolor paper. You’ll see why soon!
Stage 1
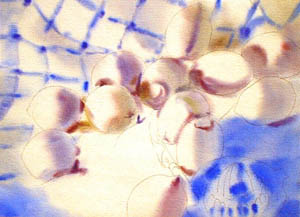 I thoroughly wet my watercolor paper on the front and back surface and then placed it on a slick, plexiglass board which was a little larger than my paper size. I re-wet the edges. I had to work rapidly to complete the stage before the shine left the paper surface.
I dropped in the shadows and blue stripes on the top left hand cloth; then I laid in the blue underpainting on the glass lemon squeezer and the solid blue cloth as shown. Making sure the paper still had a shine I laid in the lemons’ form shadows and cast shadows using a purplish gray mixed from Cobalt blue, Quinacridone Rose and a touch of Hansa yellow light.
Once completed I quickly transferred the wet paper to the cotton towel placed on a flat surface to avoid backrun watermarks round the edges.
If the shine had left the surface before I completed the shadows, I would have had to thoroughly dry the paper to set the paint and then re-wet it to prevent watermarks from forming. I could also use this procedure to re-state values. It is important to have the values correct at the preliminary stage so the second stage is a synch!
Stage 2
 On completely dry paper, using a bamboo pen, I drew several dots of masking fluid on the blue paint on lemon squeezer.
Before painting the lemon yellow on each lemon I put a blob of clear water for the high light.
I re-wet the solid blue cloth in sections and dropped on the first wash of blue paint. Occasionally I lifted out paint with a damp sable brush. I left the lemon next to the knife unpainted to show you the sequence.
Stage 3
 Studying my set up carefully, I worked in small areas as shown. If I wanted a soft edge I made sure the paint was surrounded by clear water that it could merge in to. If I wanted a hard edge I painted on dry paper. Sometimes I turned my painting upside down to gauge the underlying shapes. Finally I added the dark accents and details.
I hope you have enjoyed this step by step study for visual complements. There are many more such demonstrations in my books Watercolor Right from the Start and Color Right from the Start and as here, each one illustrates a different aspect of watercolor painting or color theory. Hilary Page’s Guide to Watercolor Paints then identifies the very best paints now available to you for your own painting endeavors!